Showing posts with label auction quilt. Show all posts

Wednesday, February 25, 2015

How to Bind a Quilt with Minky Fabric (and how to join binding ends)

Yes! It can be done!

Backstory: I made a t-shirt quilt for my daughter's school auction. It has shirts and plaid from uniforms. I really wanted to back this quilt in Minky, because I think it would make it even more appealing. But then, all I could think was how dull a plain cotton binding would be, especially from the back. So I was determined to figure out how to bind with Minky.

If you've not ever worked with Minky fabric, it's notoriously squirrelly. It's polyester, it's slippery, and it's stretchy width-wise. Many people hate even putting it on the backs of quilts. My solution to that is to use spray baste. If you pin baste, you will likely have problems because the backing could stretch and you might get puckers. However, if you spray baste, the batting acts as a stabilizer and the Minky doesn't stretch. My favorite spray baste is 505. It's not stinky like some of the others, and as long as you don't apply it too heavily, it doesn't gum up your needle. In fact, I spray it indoors and can't even smell it.

Oh, and though I quilt my quilts on a straight stitch machine, for this part I used my trusty Kenmore.


It only has 12 stitches!

I lowered my presser foot pressure down to zero and I lengthened the stitch length to about 3.

Anyway, I knew the typical double fold binding would not work with Minky. It was too stretchy, and the binding would be so bulky. After some experimenting, here's how I did it.

First, I cut my binding strips 1 3/4 inches wide. I joined them as you would a typical cotton binding. I was sure the keep the nap of the Minky going the same way.


I used a straight stitch to attach the binding to the back of the quilt. You'll see later why I chose to do this on the back. I forgot to take a photo here, but rest assured it's just like attaching any other binding, including at the corners. I did try to put it on so that when I was doing my final stitching, I would be sewing with the nap instead of against it. I attached it at about 3/8 inch, or the width of my walking foot.

I like to join my binding ends, so here's a little bonus tutorial! Be sure to leave a tail at the beginning of attaching your binding, as you probably do already. Then, when you approach the end, after you've sewn all the way around, leave another tail of about six inches, overlap the binding ends and trim your excess so that it's the same as the width you originally cut the binding. In this case, 1 3/4 inches. If you look closely, you can see the tail from the start of the binding peeking out right at 1 3/4 inches. Cut the end tail.


Overlap the ends like you would when making binding. You have to scrunch up the quilt to do this. It's awkward, to be sure.


 Pin in both directions and make a diagonal line from the corner of the top binding to the corner where the bottom binding meets the top. It should be a 45 degree angle. Again, just like joining binding strips.


Sew on the line.


This is what it should look like. Don't trim yet!


First, lay your quilt flat and make sure you didn't accidentally twist your binding when you joined it.


Okay, NOW you can trim your excess out of the binding seam allowance.


Now, if you've ever taken a class with me, you know that pinning is not my favorite thing. When I'm piecing, I rarely pin, unless I feel like I really need to. I think in general that pinning can distort things and make matching corners even harder. However, in this case? I pin. A lot.


Start sewing behind the point you stopped attaching your binding, backstitch, and slowly sew the rest of the binding on. Oh, yeah, I'm sewing over pins here. The truth is, if I'm using these pins, I sew over them fairly regularly. They're very fine. Because they're fine, the needle tends not to hit them. They're kind of expensive, but they are hands down my favorite. 


All done! No puckers!


Begin stitching from the front side. I used a three-step zigzag. I think it's much more secure than a regular zigzag. I simply ran my presser foot along the raw edge on the left.

At the corners, I stitched into the corner a bit, then took the quilt off the machine and folded the next side of the binding down to miter the binding.


That's it! I used a few pins to make sure I didn't get a pucker at the point where I approached the start of the zigzagging, but only about three. And because of the shape of the bit of Minky I had left over, it was even going cross-grain, which is the stretchy way! 

 So the reason I didn't sew the Minky onto the front of the quilt and zigzag from the back (like a typical binding) is that you can't quite tell what's happening on the back. For the most part, my back looks like this.


But in a few places, the zigzag ventured into the binding. 


If this had been on the front of the quilt, it would have been really noticeable. On the back, it's not so bad.

I hope this inspires you to use Minky for bindings some time!

Tuesday, May 17, 2011

Auction quilt, earrings and my poor, poor dog

Whoo-wee, I've been busy! My new job at Quilter's Corner is going great! Also, the Richmond chapter of The Modern Quilt Guild is in full swing. Personally, we've also been busy with RT's exam, typical end of the year school activities, and purging all of our ridiculous junk in preparation for a big yard sale this Saturday. I love yard sales. I am happy to give things to Goodwill, but I like to at least try to get something for them first. Yard sale to the rescue!

One thing I haven't done much is sewing, hence the lack of posts. But I have a few things to show. the first is a not-so-great photo of this past year's auction quilt. I stepped into the project after the idea had been determined, so I didn't have much say in how it was put together. Basically, each child chose a country and then they colored the flag for it. This photo shows it draped over some chairs in the lobby of the school. The lobby chairs all have arms, so that's why it looks so lumpy.I have to say, this is not my favorite project. I felt like the kids didn't have much involvement in it (coloring? Really?) and so they didn't have the emotional investment they have had in the past. I don't even know how much it went for! Oh well. If I do it again next year, I'll make sure I have some say in what happens. With Molly being in first grade, this was a new classroom for her.

Over Spring Break I went to Corolla, North Carolina. They rented a house for the week and Molly and I were able to join them for a couple days so RT could study. I bought these earrings.
At first I didn't realize why I liked them so much. There were several styles, all using the same beads, but in different shapes. Later I realized these look like little quilts! No wonder I love them so much!

In sad news, Snickers is not doing great. She's 16 now, which is very old for a Belgian Malinois. She has been losing weight like crazy. For most of her life, she was 55 pounds. A couple nights ago she was down to 29. She still eats, but nothing sticks with her. The vet said she probably has cancer somewhere but she's so old she wouldn't be able to withstand the anesthesia for a biopsy, much less any kind of treatment. I don't know how much longer she'll be with us, but for now we just love her and pamper her as much as we can.
Those bumps sticking out by her waist are the wing-y parts of her vertebrae. And here you can see her backbone pretty clearly.

Those are her hipbones; yes, they are.
A dog with this much undercoat shouldn't show her ribs. But I don't think she's hungry. She eats with the same patterns as she always has (leaves part of her breakfast but eats it all at dinnertime). I think it's just not staying with her; the cancer is taking all the energy and nutrients. This post shows what she looked like in healthier times.

We have had her a long time. We got her when she was seven years old from the Humane Society. I never thought she'd be with us longer than she was with her first family. She's a wonderful companion and we are doing our best to show her that we love her. I don't think she's in pain. She doesn't pant or whine. And she still wags her tail and follows me around the house when I have food. So in that sense, she's just like she always was. What a good dog.

Wednesday, April 7, 2010

Busy, busy, busy and auction results

I haven't been posting, I admit it. I've been busy with non-quilting things, though I have lots in the pipeline. Unfortunately, my sewing room is a disaster, so not much is being done there, and it's spring break, so I'm home all day with Molly so nothing is being done at the shop. And somehow, I'm still busy, and often gone, all day long. Not complaining, mind you. Just explaining why I haven't posted.

But I was amiss in not letting everyone know that the latest auction quilt went for $1200! It was won by a friend of mine, so that makes it doubly great! The placemats only went for $15, but they were also won by the same person, so I'm happy that she got them.

In Molly news, we have a new tooth. I need to make a tooth fairy pillow, pronto! If you know of a good pattern, please post it in the comments! It's coming in behind her front teeth but I've been assured it will be okay in the end. I see orthodontist appointments in our future.

Friday, March 26, 2010

The Auction is Tomorrow!

The 2010 auction is tomorrow. I even bought a new dress! Molly is having a friend over whose parents are also going to the auction. Wonderful Monica is going to watch them and they're having an all-out girly night.

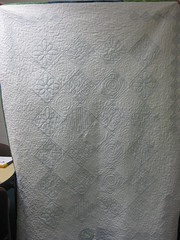
Here are final photos!

Back:

Thursday, March 11, 2010

All backgrounds done!

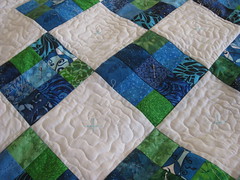
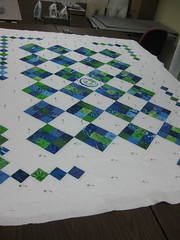
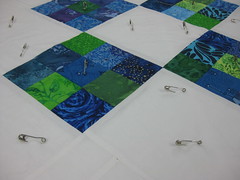
Here's the auction quilt so far:All the background (white) is quilted. The little + signs are disappearing ink, so I'll make them go away, of course, before it's really done. Tomorrow I will go into school and have the kids pick a quilting pattern for their blocks. Then I'll quilt it in front of them. It's nice to be on the home stretch. Then, I just have to hide a few threads, make the binding, apply the binding and sew the binding to the back by hand.

Sunday, March 7, 2010

Mama's new toy

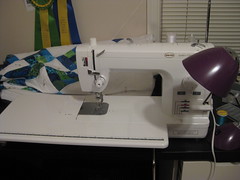
Well, I'm making more progress on this year's auction quilt. On Friday, I basted it. This is the last time I do a true white background. There were so many threads to cut! I spent at least and hour and a half trimming threads from the quilt back.Also, my new machine is here! Don't ask, but it was actually available when I ordered it on Monday (they had one in stock, apparently, that I could have had). Oh well. It made me get a couple things done in preparation. But here she is! I've done some quilting on her already. Now I just need a name. Any ideas?

Monday, February 15, 2010

Playing with Paintstiks

On the auction quilt, I've been wanting to include the school logo somehow. It's where I got the colors, after all. First I tried embroidering it.
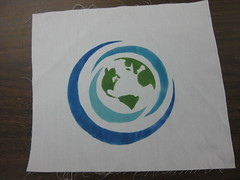
It looks cute, but not bold enough. Then Ann at the shop suggested Shiva Paintstiks. Here is my first attempt. The colors aren't quite right (the light blue is too teal, for example), so I'm glad I did a practice run.
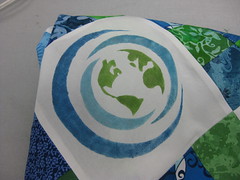
Here is the logo in the center white block of the quilt. I'm going to use my practice block and try outlining it with embroidery to sharpen up the fuzzy edges. But I am happy with the colors.I'll post photos of the embroidered sample when it's done, but I have to let the paint cure for three days first. I really don't want it to smear!

Thursday, February 11, 2010

Quilt top mostly done

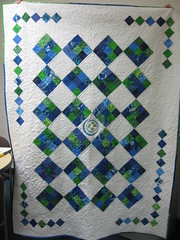
The auction quilt top is basically done. I took it in to the school today to show the kids. I am going to try embroidering the school logo in the center block. Well, actually, I'll probably embroider one on a plain bit of fabric first and hold it up to see how it looks. If it comes out, then I can use that on the back. Anyway, the kids all did the nine patch blocks. The other squares are just to frame them. It's way more traditional than last year's quilt, but I think it's pretty. It's being auctioned off along with a book of fairy tales and a bedtime story read by the teacher. I'm hoping for big bids!

Tuesday, February 2, 2010

Opinions needed!

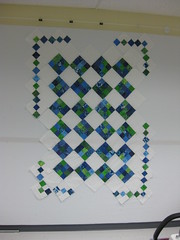
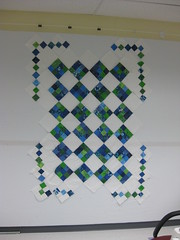
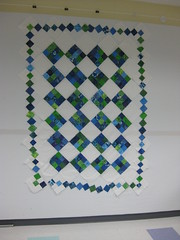
I'm working on this year's auction quilt. The kids have designed the blocks and I have them laid out on point. I want to put more small squares in the border but I'm not sure how to lay them out. I have gotten a few opinions but I want more! Keep in mind that this quilt will be auctioned off along with a storybook and a bedtime story by the teacher. It's meant to be a large throw for a child. It will be approximately 60 inches wide and will have some white on the outside before the binding, which will be blue/green. I am going to try embroidering the school logo in the center square (and maybe in more depending on how much time that takes).

So, which do you like and why? Please leave comments! The samples are all up on a design wall, and some of the squares are temporarily stuck up there. So ignore any crooked squares, please.

Asymmetrical border:

Symmetrical border:

Full border:
I'd like any and all feedback. Again, ignore the crookedness of the outside border, especially in the last photo. I was running late for my radiation appointment when I took it!

Thursday, January 21, 2010

20 down, 4 to go

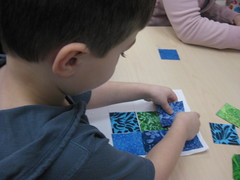
I worked with the kids at Molly's school today to make their nine patch blocks. I swear, the pattern for this quilt has changed a dozen times since its inception. Anyway, a lot of parents came in to help the kids with the project. I was able to sew the blocks right there. It was very cute how interested in the sewing machine some of the kids were!
I had them stick the 2.5 inch squares to a paper with the block drawn on it, using double stick tape. Now to really figure out what this quilt is going to look like! Must. Make. Decision.

Wednesday, January 20, 2010

Auction quilt, 2010, and a project from the retreat.

Way back at the quilting retreat I went to in November, it was raining when I unpacked and I had no cover for my sewing machine. So, I bought a half yard of the cutest polka dot oilcloth from the shop and made myself a cover. It's not fancy, but I'm proud that I didn't have a pattern or anything.
My big upcoming project is this year's auction quilt for Molly's school. I'm starting much later than I did last year, and with the radiation treatments coming up, things might get tricky. Last year at this time I had already finished quilting the top and was beginning the beading. Yikes. But this year, I don't plan to do much, if any, embellishing. So, things should go more quickly. All I have to show you today are some pretty little squares. But tomorrow I'm going to the school and I'll be sewing nine patch blocks with the kids. Parents are coming in to help, so I think things should go smoothly.

Sunday, September 27, 2009

Two for two!

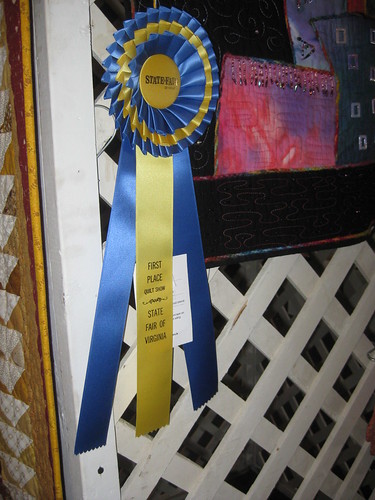
Well, we went to the Virginia state Fair today. Both of the quilts I entered won ribbons! The safari quilt got Honorable Mention in the Crib/Small Bed Quilt category.
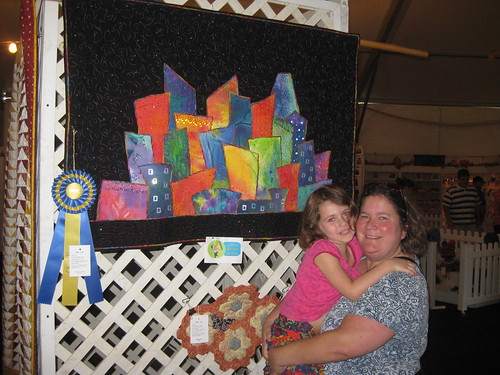
And the auction quilt got First Place in the Art Quilt/Wall hanging category!
We're tired and happy here at our house!

Wednesday, April 22, 2009

Online Quilt Festival

Amy at Park City Girl is holding an Online Quilt Festival. Here's my entry. It's the art quilt that I made for my daughter's school fundraising auction. I had each child in her class (it's full of three-, four- and five-year-olds) dye fabric with Dye-Na-Flow, then made them into this quilt. There's lots of beads and some embroidery, too. The whole story is scattered around on my blog, since I started the blog partially so that the parents could keep track of the quilt.

Sunday, March 29, 2009

Final auction quilt posting

Hey there. I'm tired but I wanted everyone to know that the auction quilt went for $700. This is actually a little low compared to some of the class projects, but I was told by a number of people that the amount things go for often has more to do with which parents are in the class than what the project actually is. I got a lot of really good comments about it. The person who won it isn't even a parent from Molly's class. She just loved it!

Wednesday, March 18, 2009

Done, and done!

The auction quilt is officially done and turned over to the school. It's still on display in the lobby, along with the other auction projects. I had to take it back to do some final beading because there were two buildings with no beading whatsoever. Also, I needed to put a little dab of glue on each beading knot. This actually took more time than expected. The glue is to make sure the knots don't unravel over time. The beading thread is at once slippery and sticky. It's very fibrous, and feels kind of like dental floss. But at the same time, it's sticky. If my thread knotted unexpectedly while I was drawing it through the quilt, I often couldn't get the knot undone. This was especially true when I didn't have a certain color thread and therefore used a Sharpie to make white thread the desired color. I have many of the cool colors of thread — blue, teals, a couple of shades of purple — but I didn't have orange or red.

This is one of the blocks I beaded last. It's turned sideways here. It's technically beaded fringe, but it stands up off of the quilt. Only the ends of the fringe pieces are sewn down. I can't decide if it looks good or it looks like the building is being attacked by some sort of plant-like aliens. Eh, what's done is done!

Here is the back. Everyone always comments on the back, and since it's often the first thing they see, especially if I'm pulling the quilt out of a bag, they think that's it! Don't tell anyone, but the fabric is 90 degrees off. You can tell if you look at the flowers and their stems. I did a double hanging sleeve because the quilt is wider than one length of fabric and I was feeling stingy. Plus, that's one more place to anchor it on. The label has a map of the quilt which is numbered along with a key telling people which child did which building. There's also an explanation of the ingredients and techniques. And how to care for it. I always feel a little self conscious putting labels on quilts, but not in this case. I also put a copyright on there for my design. I hope that wasn't too obnoxious.

For those who are on facebook, I'll post a bunch of photos, including closeups of most of the buildings. And now I get to take it off of my UFO list!

Friday, February 27, 2009

First deadline

It occurred to me that some people may not know what I'm talking about when I constantly bring up this auction quilt. Well, here is the story. My wonderful four year old is going to a private school which has an annual fundraiser auction. There is a silent auction with all the typical silent auction type things (I'm donating one of my beginner classes for that). There's also a live auction, and each class is making a project which will be auctioned off. The auction is at the end of March, but they wanted the class projects to be in the lobby for today, which was parent-teacher conference day.

I had everyone in Molly's class (23 total; one has moved away) paint fabric using Dye-Na-Flow. This fabric paint works essentially like dye and is very easy to use. I took the kids' finished fabric and made the auction quilt out of it. The theme of the auction is New York, New York. So, the quilt is of a skyline (not specifically NYC's skyline). Each building represents a child in Molly's class. The design is mine. I have done all the piecing, couching (of yarn), free motion quilting and most of the embellishments. Here, finally, is a crappy photo of it hanging in the lobby for conferences:

And here is a photo of the whole display:

It's not quite done. The tallest building (the blue one on the right) needs embellishing. I also need to glue down some of the knots on the back so the beads don't come loose over time. And I need to label it. And I need to get good photos of it. So far it has about $250 worth of materials in it and countless hours. I have to figure it out, but it wouldn't surprise me if I have 100 hours in it by now. I hope it gets a lot of bids!

In other news, I went to the Mid-Atlantic Quilt Show today. Lots of eye candy, only some shopping. I'll try to post photos of what I bought later.

I am hoping that whoever wins the quilt will donate it back to the school for display. And I'd love to try to enter it in Mid-Atlantic next year (if it's good enough). Maybe the winner will let me borrow it? We'll see.

Wednesday, February 25, 2009

The deadline looms

Friday is parent teacher conference day, and the auction people want to have the class auction projects hanging up for that. So, my deadline is basically tomorrow afternoon. I teach my newbie class tomorrow night, so I won't have much time to work on it then. My goal is to drop it off when I pick up Molly. I have nearly all the beading done and I have sewn down the hanging sleeve. I haven't done the label yet, but that can wait until after the auction. It has to be the last thing because I don't want any beading threads to go though it. So, here are lots of photos!

First, some lovely embroidery by Sew~Amy (whose birthday is today!):


Then some embroidery by me:


And two photos of beading that I like:


Some beading I'm so-so about:


And one I just don't like. I'm taking it out tomorrow and doing something else. I think it looks like candy (and not in a good way):